Over the next few weeks I shall be writing up about my latest project… My Russian Jumper… which I hope to have finished in time for Christmas. I am hand knitting it from Bluefaced Leicester (BFL) yarn that I spun and plied myself and then naturally dyed. The pattern is also my own creation, although most of the individual motifs I discovered whilst searching for historic knitting and embroidery motifs. The overall pattern instructions were created in a great online tool for just that sort of thing. And the overall pattern was created in another free online tool. I am going to share the process and let you know where you can find these online resources in this post.
This is one of my slow projects. These are projects I like to have trundling along through the year. They tend to take shape as I go along, which I like because it usually means that what I end up with is something that I will love for years and years. They are also projects that have an ambition – usually to take a long slow journey, one which will push me beyond my last great achievement. This one will be the first where I have spun, dyed, designed and knitted the entire thing. I have a sweater that I spun from a merino/silk roving which I bought from one of my favourite suppliers, John Arbon. But I didn’t dye it and it was a very basic design.
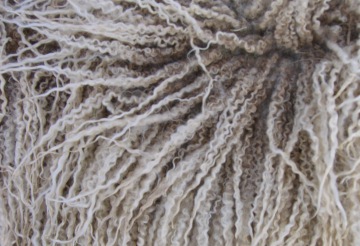
The Russian Jumper project started in the New Year. I spun the yarn during the spring using wool top from a beautifully silky and lustrous longwool breed of English sheep known as Bluefaced Leicester, which I purchased from World of Wool.
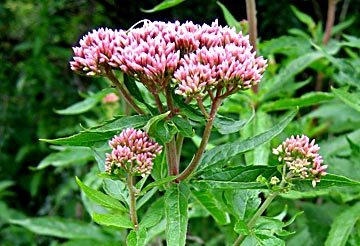
During late August I dyed about two thirds of it with Hemp Agrimony (Eupatorium cannabinum) which I grow in my allotment. I first read about dyeing with this plant in one of Jenny Dean’s books. I have a lot of respect for her work and she is very good at trying out less than standard dye plants. But it was already a long standing favourite of mine from my days living in Cornwall where it grows in hedgerows and damp places. Its is absolutely beloved by bees and butterflies and in my allotment is a major food source at the dry end of the year for the bees in our allotment apiary.
The other third of the yarn I dyed in an indigo vat in September which I made with my niece, Chloe Mullaney, who wanted to learn about indigo dyeing. She has written a beautiful blog about this, packed full of wonderful photographs that she took on the day if you want to learn about how we made the vat and see the beautiful shibori work she did.
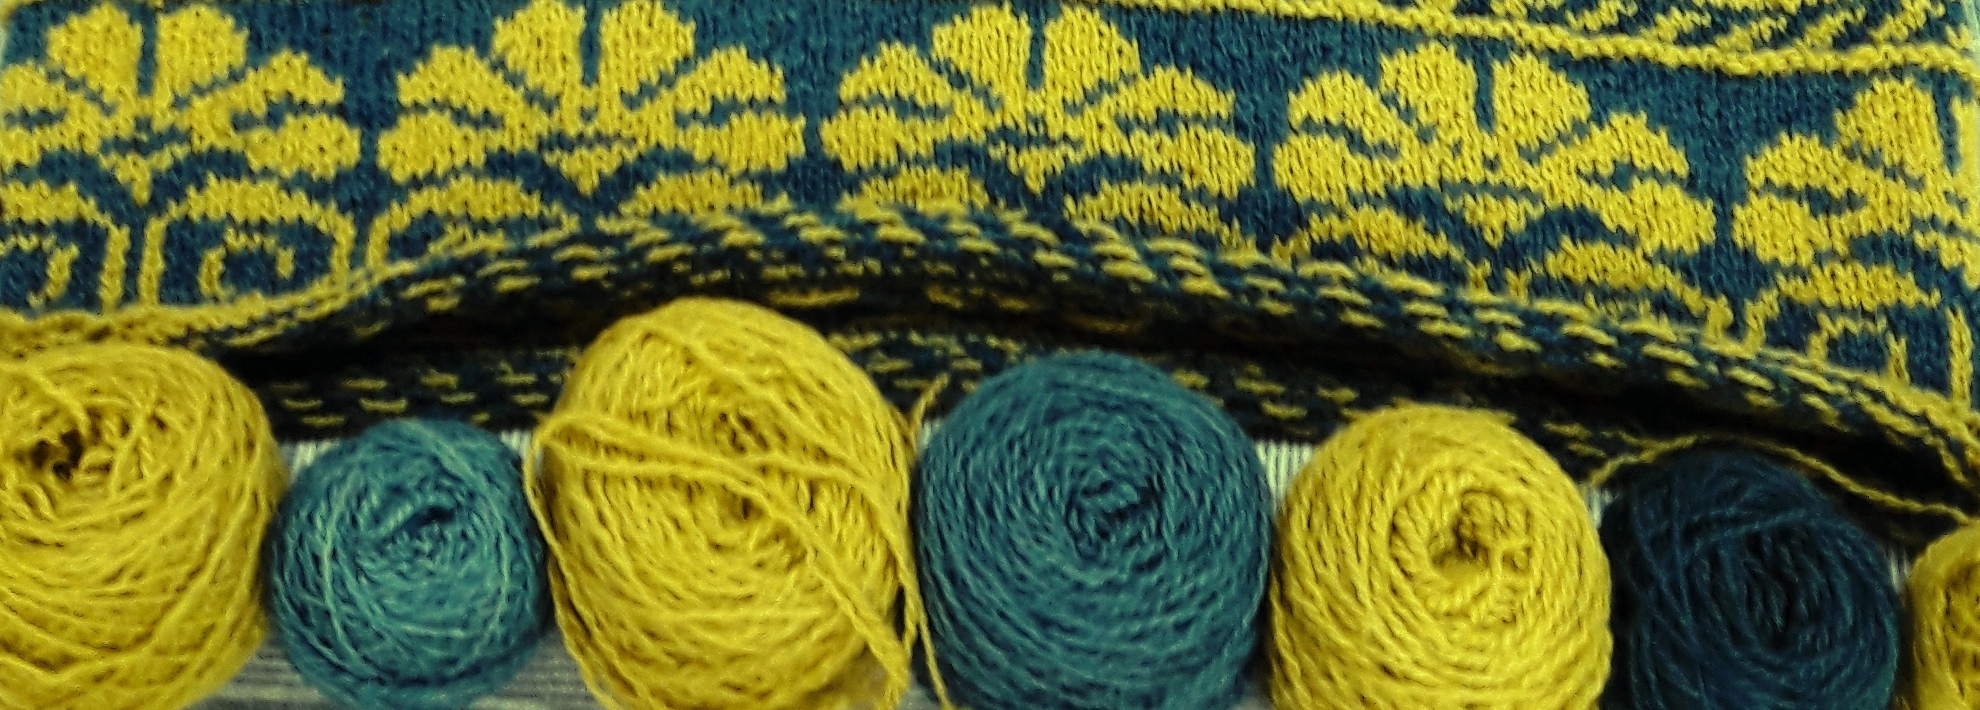
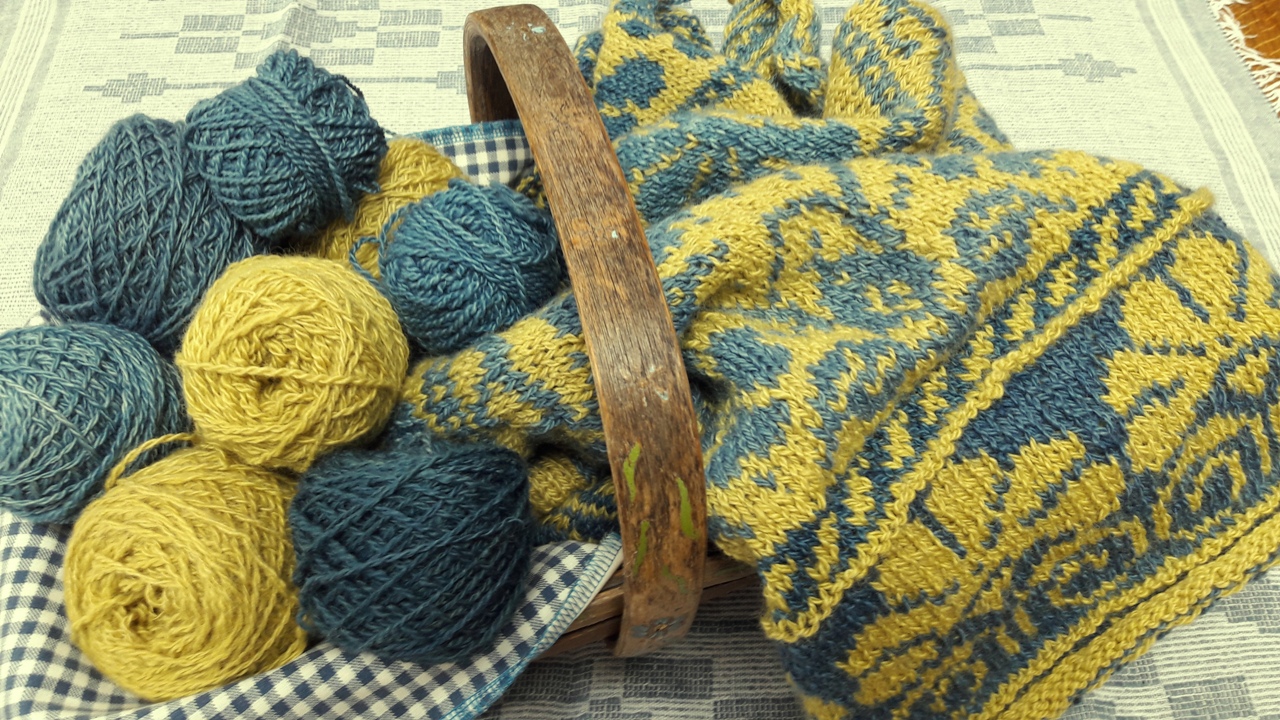
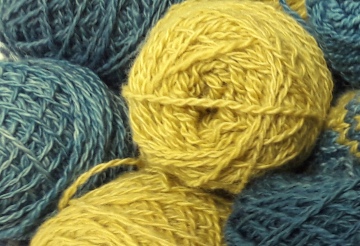
Having created two great piles of beautifully deep chartreuse yarn and various shades of indigo I gave my self lots of time to dream up what I might do with them. I should mention that the chartreuse coloured yarn is the most stunning shade of yellow with the slightest twist of lime. My photographs just do not do it justice because it looks far more teddy bear coloured than in real life. You will have to use your imagination until I can fix that… but it is one of the things I most love about naturally dyed yarns. They dyes seem to impart colours which we are no longer accustomed to seeing in our standardised chemical dye world. They defy common naming strategies and often have a luminosity, depth and vibrancy that is quite unique.
The next step was to knit a tension square so that I would have an idea of the weight of jumper I might knit. I’m not disciplined enough to spin to a specific gauge and prefer to spin to an approximate yarn type – lace weight, 4-ply etc. with a vague idea of the project I want to do. It works for me as I find I can be a bit more relaxed – lazy perhaps – but when I spend so much time being very precise and focused in my weaving it is good for me to have personal projects that are more about the simple pleasure of the activity.
So I had spun and plied a yarn with a really warm winter sweater in mind. I have another spinning project on the go which uses Shetland wool and I am spinning it very softly and woollen-spun to knit a Norwegian style sweater which will have a soft halo to it. For this sweater I wanted something quite different, so the yarn was spun a little more in on the worsted side with a lustre wool.
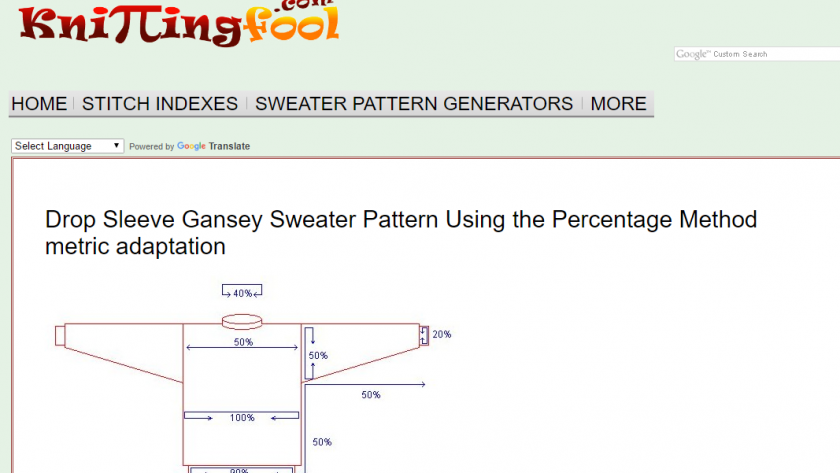
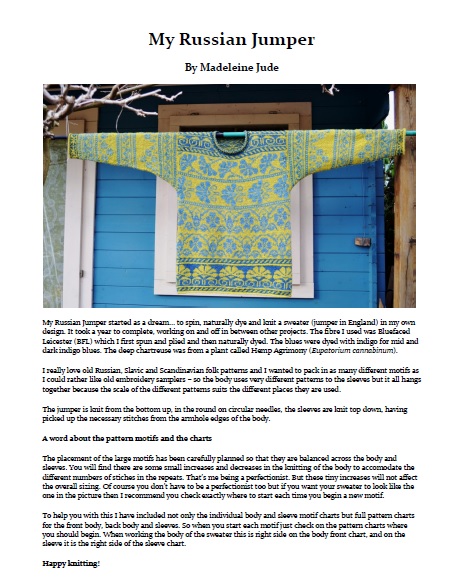
Having swatched the yarn and worked out the gauge I used a great online tool that takes your measurements, the yarn gauge, and the desired fit, and gives you back a basic pattern for various styles of jumper. The site is KnittingFool.com and the jumper design I chose was the drop sleeve gansey you can see in the picture above. Its a very basic pattern, and they do warn you that it is not aimed at complete beginners as the instructions are adequate if you understand how to construct such a jumper. No hand holding here, I’m afraid! But just fine when all you want is a straight forward pattern.
Having generated my overall sweater pattern I now knew how many stitches it was going to take, knit in the round – which is the method I wanted to use. That helped with having an idea of the scale of the patterns I would need. There are lots of ways to find pattern inspiration, google images, instagram, old books, etc. I chose to go to my Pinterest folders as I have been collecting pattern inspiration ideas for a while. The patterns I used, other than one of my own motifs, can be found in my pattern inspiration Pinterest folder.
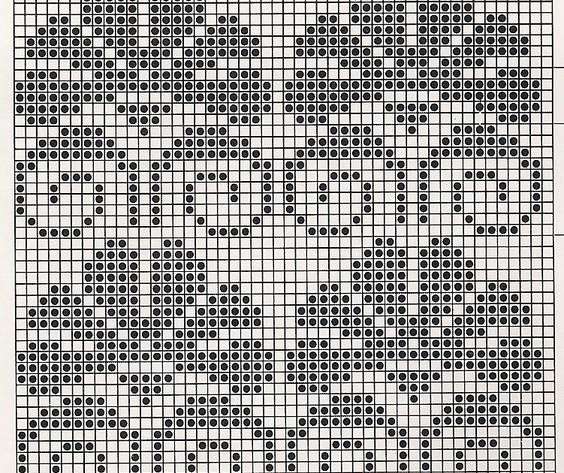
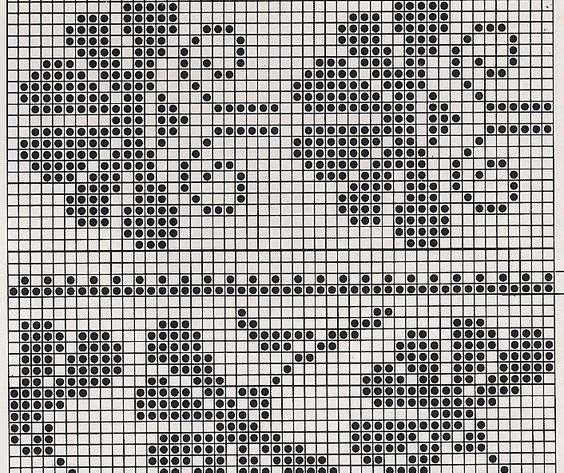
The two patterns above I found through the website of Natalia Anisimova, originally from Leningrad and now living in Norway. Natalia has collected all sorts of old books and patterns for many years and is now sharing her collection with other knitters. These two patterns were used in a vintage sweater design.
Using these motifs, one or two o f my own, some folk embroidery patterns and some small fairisle peerie patterns to work between them, I then turned to another online tool to create my own design.
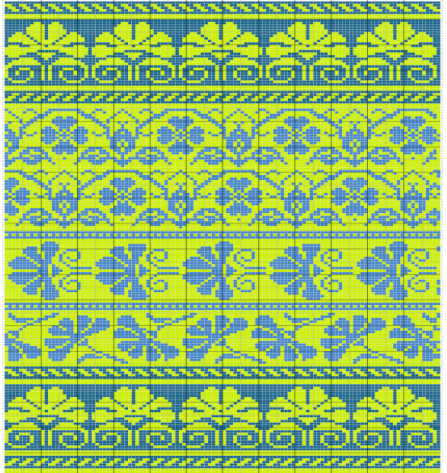
There are a number of fairisle pattern generators to be found online. I like the one stitchfiddle. Its simple to use, you can create a fairisle design very simply and then use it to highlight the line you are working as you knit. I find that so helpful as I only need to concentrate on that one line and I make very few mistakes that way. Apart from colour work you can also use it to indicate plain or purl stitches, etc. for other designs. And again, its free, which is just wonderful.
Well… enough for now… again. Keep coming back to read the next instalments. The next part will be about the sleeves. I am using other designs for the sleeves and have only just started them so there will be photos coming in the next few days…
And don’t forget… if you like what you see do please let me know by leaving a comment!

Read My Russian Jumper… Part-2 to see the photos of the completed jumper.
 You can now purchase the pattern for My Russian Jumper on Ravelry or you can simply click the link below to buy it now.


7 Comments
jane pennington
20th October 2017 5:38 pmi love your jumpers
Madeleine Jude
20th October 2017 5:43 pmThank you so much. I am loving it too!
jane pennington
20th October 2017 5:39 pmwhat sort of wool or other materials do you use?
Madeleine Jude
20th October 2017 5:45 pmI used Bluefaced Leicester wool, which I spun and plied myself. The yarns were then dyed with indigo for the blue and Hemp Agrimony for the yellow.
Lucy
22nd February 2018 8:49 pmLove this sweater. It’s great to see you did everything yourself, from spinning, dyeing, designing and knitting. Very impressive!
Madeleine Jude
22nd February 2018 9:29 pmThank you Lucy. It was on my list of things I always wanted to do. So that’s another one struck off.
Leave a Reply